The Ultimate Guide to Injection Molding
Injection mold tooling is a manufacturing process that entails the injection of molten material into a mold cavity. Ejection of the material follows soon after its cooling and several parts can be produced in successions.
Now, considering its aplenty benefits, its little wonder bespoke that injection mold tooling is increasingly gaining popularity than ever before. While there exists a consensus among a vast majority that injection molding is an ideal manufacturing process, the whole process is not a piece of cake. Here is your 2018 updated injection molding step by step guide.
- ** Clamping**
The injection molding cycle never commences until the mold closes. The closure of the mold is achieved by clamping. It’s worth recalling that the injection molding machine is composed of three parts; the mold and the two units of clamping and injection.
The clamping unit in itself consists of metal plates. Plastic injection molding begins after the clamping together of the mold with the exertion of pressure. This is ideal to achieve and maintain the two processes of injection and cooling.
- ** Injection**
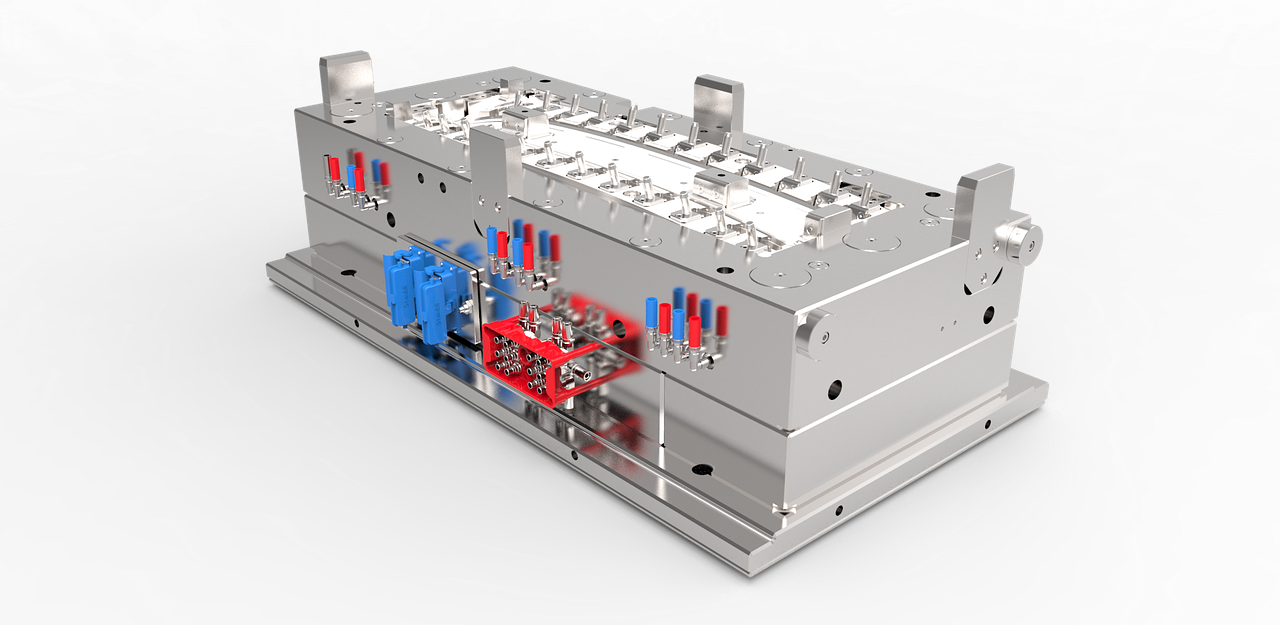
 injection molding
Next in line is the injection phase. During this process, the plastic material that has melted in the first step to pellet form is now transmitted to a hopper lying just above the injection unit. These pellets are then fed into a cylinder for heating and subsequent conversion into molten form. The cylinder has a motorized screw that allows for the mixing of the molten pellets.
The injection process does not commence until sufficient material has accumulated at the front end of the screw. The molten plastic is finally passed into the mold through a channel. It should be mentioned that the screw also plays a key role in the regulation of speed and pressure at this stage.
- ** Dwelling**
The dwelling process brings the injection process to a halt. Soon after the injection of the molten plastic into the mold, more pressure is applied in a bid to fill all the mold cavities.
- ** Cooling**
As its name suggests, this step entails the cooling of the molten plastic to convert it back to solid inside the mold.
- ** Mold Opening**
At this point, the aforementioned clamping unit separating the two halves of the mold is opened.
 injection molding
- ** Ejection**
This marks the final phase of the injection molding process and is achieved by the use of an air blast or a plate and rods. The ejecting rod pushes the ejector pins forward, ejecting the final product from the mold.
In this manner, the plastic component is wholly removed from the injection molding machine. The good news is that the unused runners and sprues can always be recycled for future use and this marks one of the biggest advantages of the injection mold tooling.
So that highlights the basic steps of the injection molding process. It is worthwhile to note that this process presents countless advantages over other manufacturing processes. Ranging from low labour costs to low scrap rate, and high productivity among others, there are plenty of reasons to opt for this process for your manufacturing needs.
Understanding the vital steps of injection mold tooling will go a long way to ensuring you make the best decision regarding your manufacturing needs.