truesourcesoftware.com
  • Home
  • Technology
  • About Us
  • Contact Us
  • Resource
  • Terms of Service
  • Write for Us
Home - Manufacturing
Category:

Manufacturing

Manufacturing

5 Different Forms of CNC Machining Finishes

by Stanley November 6, 2021
written by Stanley

The CNC machining process involves stripping an object off its material to create a specific part. The development of machining parts involves cutting using sharp tools and equipment depending on the application. The manufacturing process is fast, and the resultant parts are high-quality, accurate, and efficient. However, most parts are not ready to go until finishing is done. Some in the early stages of production are good to go, but finishing the surfaces is always good. In this article, we delve into the types of CNC machining finishes.

Types of CNC machining finishes

CNC machining finishing options come in different forms. They are used to enhance the surface appearance of parts and also better their performance. They make the parts smooth, sturdy, and corrosion-resistant. Choosing the right finish can be challenging, but we mention and discuss their use below for easier recognition.

1. Anodization

Anodization is known to thicken the outer oxidized layer of a metal product. The layer minimizes the effects of corrosion on metal and protects it from wear and tear. In addition, this type of finish enhances heat dissipation and makes part coloring easier. There are two types of anodization finishes; Type II and Type III. They are suitable for aluminum metals and are used to create parts like aircraft parts, automotive parts, medical components, architectural features, and consumer electronics.

2. Powder coating

This surface finish option involves the spraying of paint in powder form on CNC machined parts. The part is left to dry and later placed in an oven to bake. This procedure hardens the part making it highly durable. It also becomes wear and corrosion-resistant and is easy to color. Powder coating finishing is used on most metal materials to form components like bicycle parts, house appliances, architectural components, and automotive parts.

3. Coloring

Coloring is classified as a type of finish, but it’s made possible by applying powder coating and anodization finishes. Coloring the already finished parts makes it aesthetically pleasing to consumers. The finishing is suitable for use on most plastic and metal components. It is mainly used for consumer products and to demonstrate prototypes before the actual product is developed.

4. Bead blasting

The process involves forcing glass beads onto a part surface at high pressure to make its surface smooth. It is an effective method used to change the surface nature of a CNC machined part. Bead blasting finish is ideal for both mechanical and functional parts, but it is loved for the aesthetically pleasing look it leaves on products. It creates a matte finish that depicts luxury. It is used on various metal and plastic components such as automotive parts, household components, and signage.

5. As machined

This is where the machined parts are left as they are. All finishing options are great; however, some parts look good with their original appearance. Parts with this finish are more affordable, but their surface is not as smooth as the finished kind. It is used on fasteners, prototypes, and functional parts.

Bottom line

CNC machining is a very versatile machining process. The machined products can safely go through the finishing process to better their appearance, performance, and corrosion resistance. The multiple finishes provide you with a wide range of options to choose from. Select the best finish based on the materials of the machined parts or the look you want.

November 6, 2021 0 comment
0 FacebookTwitterPinterestEmail
Manufacturing

A Guide on How to Design a PCB Layout

by Stanley July 23, 2021
written by Stanley

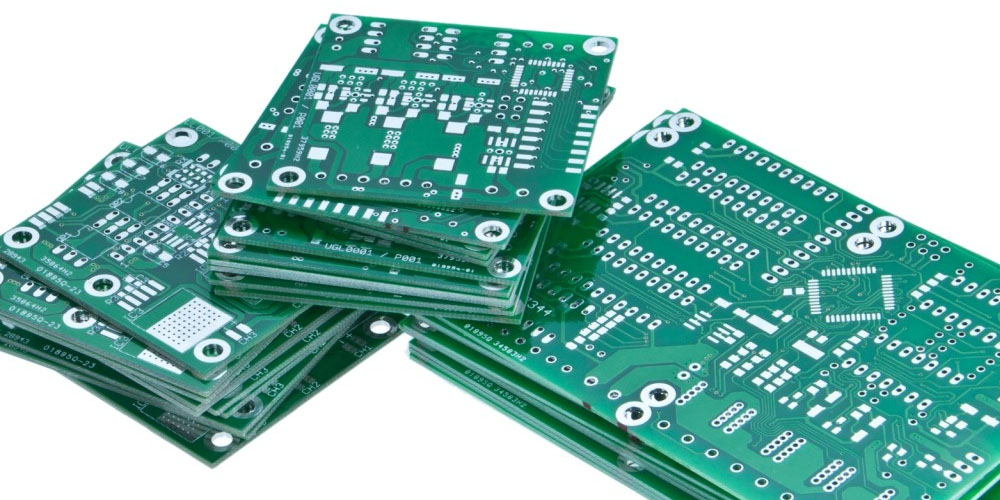
A PCB layout designing is critical because the wiring quality influences the performance of the system. The layout developed must be efficient, reliable, cost-effective, and still perform as required. Unlike the past years, the modern PCB boards are compact, complex, and lightweight; hence so much work is put into knowing the correct layout design. Several aspects must be considered for the PCB layout to develop a design that’s fit for the real world. We expound on the steps for designing a PCB layout below.

Steps for Designing a PCB Layout

PCB layout design has a significant role in the entire development process. Below are the six steps contained in the design process.

1. Determining the Concept

The process begins with the concept, but after knowing why you need a PCB. The concept involves identifying what the PCB is supposed to do, its qualities, and how it will be connected with other devices and circuits.

Still, in this first stage, the electrical engineer determines its placement on the end product and approximates its size and dimensions. PCBs are used in many applications in different environments with varying temperatures. Consider the maximum range of temperature the PCB can reach and the settings it can be used in and still function correctly.

2. Schematic Drawing

This step draws its idea from the concept phase. The circuit diagram is drawn to a smaller scale and consists of the names, ratings, and values of all the components connected to it. Any additional information related to how the electrical components operate is also included. Since all device names are now known, the material bill is developed in the process, and you can tell approximately how much money is needed to facilitate the design process. The documents are constantly updated in case any changes come up.

3. Board-Level Block Diagram

It is a drawing to show the final size of the PCB, with the exact measurements to be used by the electronic engineer. Divide the board into sections and put a mark where each block will be placed. In addition, Designate the components into sections based on their connectivity and similarity for short and more straightforward tracing.

4. Placing of Components

The fourth step is to determine the positioning of each component in the board. Component placement may not occur immediately because the chances of refining may be high until the designer gets a perfect position.

5. Routing

Routing is closely related to the placement step. Wires are added to the board to connect all components and form a complete circuit. In the process, all Integrated Circuit design rules are followed for proper functioning.

6. Testing

Product testing is the final step of the PCB layout design process. It determines how viable a product is and if it qualifies for use or needs to be worked on again. Conduct several tests to see if it meets all your requirements. If not, recommend the necessary adjustments required for it to operate as desired.

Conclusion

Proper PCB layout design prevents electrical problems like interference and promotes good signals. You should follow the step-by-step guide as it is for excellent results and ease of identifying any errors.

July 23, 2021 0 comment
0 FacebookTwitterPinterestEmail
Manufacturing

All you should know about Vacuum Casting

by Stanley July 1, 2021
written by Stanley

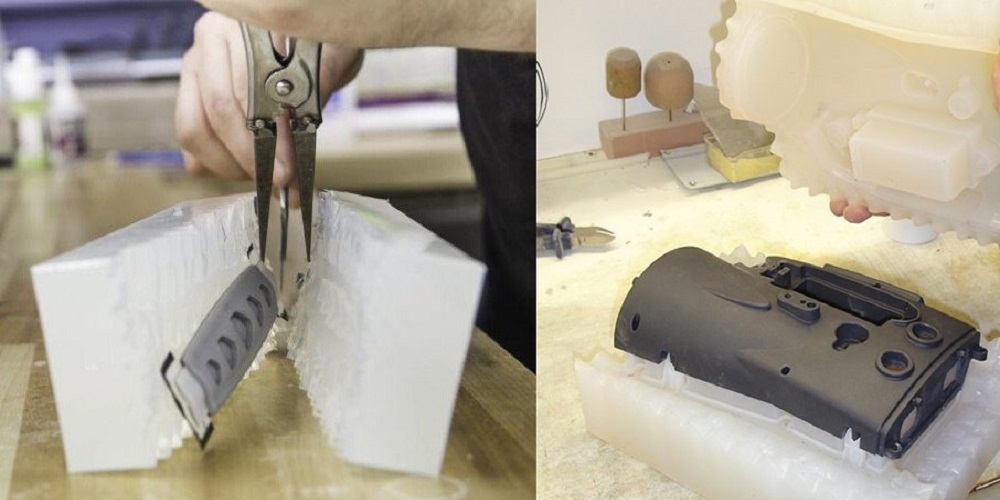
While creating CNC parts using CNC milling, vacuum casting can be used to make rubber and plastic components. This is done through the use of silicone molds. Just like injection molding, vacuum casting is quite adaptable and can serve in the production of cast nylon, polyurethane resins, and other complex parts.

Stick to this piece to see answers regarding some of your commonly asked questions regarding vacuum casting.

1. What is Vacuum Casting?

Vacuum casting refers to a process used for casting for elastomers. These elastomers often use a vacuum that draws materials made out of the liquid into molds. The process is typically used whenever there’s an air entrapment problem. Several undercuts and details are intricate. An example of this can be seen when the material wire or fiber gets reinforced.

2. What Keeps The Mold in Place During Vacuum Casting?

The master model becomes enclosed into a rubber mold that has two-part silicones. This mold gets cured under very high temperatures, which ensures that these two parts remain glued together. They are used to strengthen the entire mold and used to make it durable.

3. Why Do People Make Use Of Vacuum Casting?

Vacuum Cast Parts are known to be of high quality. The cast resin copies of mastered patterns show a high level of fidelity to the original patterns. This means that resin cast prototypes perform and will most likely look exactly like the plastic injection molded parts used for production.

4. What is Vacuum Forming?

Vacuum forming refers to a type of manufacturing method which is used to shape materials made of plastic. All through the vacuum forming process, plastic sheets get heated and are pulled using single molds through suction methods.

5. What Amount Of Vacuum Is Needed to Cast Resin?

The amount of containers that hold resins needs to have more than enough headspace to take about three times the actual resin volume. The vacuum gets pulled about twenty-nine inches to mercury.

6. What is the Molding Compression Process?

The molding compression process is seen as a molding process where the material used for feeding is placed into a heated open mold cavity. The mold is closed using a compressed top plugged in large hydraulic presses to contact all mold areas.

7. What is Pressure Die Casting?

Pressure Die-casting is a method that is used to massively produce metallic, low-temperature components using a high degree of repeatability and precision. It is not like gravity dies casting, the process is automated, and the alloy or liquid metal gets injected using very high force into a steel tool. The steel stool is mostly hard, strong, and durable for production.

8. What is Low-Pressure Casting?

Low-pressure casting refers to a production technique that uses pressure instead of gravity that fills molds using metal in molten form. These metals include magnesium and aluminum. Using this process, the furnace which is used for holding is located below the cast. The liquid metal is forced above using a tube that rises straight into the cavity.

Final Thoughts

And there it is! These are some answers to your questions. If you’ve always been confused about vacuum casting and all there is to it, then you should probably start here!

July 1, 2021 0 comment
0 FacebookTwitterPinterestEmail
Manufacturing

Is There a Difference Between FDM and FFF?

by Stanley June 24, 2021
written by Stanley

The confusion between Fused deposition modeling (FDM) and Fused Filament Fabrication has been on for a while now.

People keep wondering if they are the same. Some say they are, but others disagree and say they are different. The only way to find the answer is to look at the details.

In matters like this, it is always best to go back in time to see where each of these organizations started, to know how they have progressed over the years, their similarities, and their differences.

Putting the working principle of both processes before all is a good way to determine the differences and similarities. It will also compare the quality of their products.

Fused Deposition Modeling (FDM)

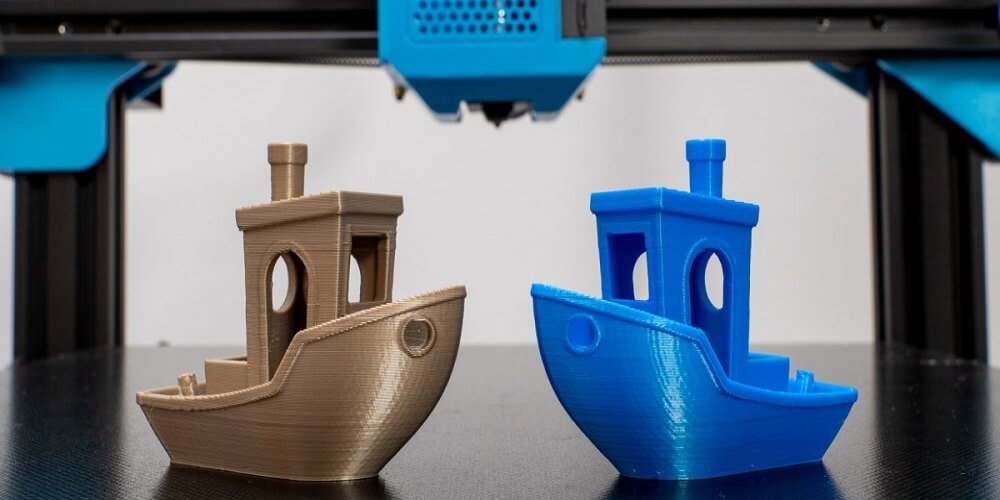
The FDM belongs to Stratasys, Ltd. Stratasys patented this technology in 1989. The well-known FDM machine a nozzle assembly, a table or built-platform, and a material filament.

when the filament enters the extruder, the extruder heats it with temperatures reaching 320 degrees Celsius. until it melts.

The filament then comes out through the nozzle and is carefully and selectively layered on the build platform.

The whole process of heating and melting and layering through a nozzle is isolated from the ambient environment.

The 3D printing process is built to maintain the temperature of the thermoplastic material that is used to print out 3D designs.

The temperature maintenance is done in order not to cause any structural damage that can result from sudden cooling damage to the design.

Fused Filament Fabrication (FFF)

When the FDM patent expired in 2009, a group came up to start manufacturing their version of 3D printers that FDM previously had.

This group called their equipment the Fused Filament Fabrication.

The purpose of the group that came up with FFF was to enable complex products to be manufactured without any industrial infrastructure set up.

They wanted people to be able to create complex components without big manufacturing bodies getting involved and using their industrial machinery to further it.

The FFF made a few changes in the design of their machine. The FDM used the process of heating the whole print chamber. The FFF did away with that part of the machine to save cost.

This meant that in the FFF, the filament goes through a hot extruder, then through an ambient environment, and then to a cold table.

The sequence of a hot to cold to hot pattern caused residual stresses in the model that was printed.

Conclusion

Back to the question. Are FDM and FFF the same technology? Well, yes. But that does not mean that they are the same thing.

They are both very similar but maintain some differences. Even though the FFF and FDM have the same architectural processes, the major difference is the output quality.

There is an obvious difference in the quality of their products. This is a result of the heating sequence in the different printers.

The FDMs heating sequence is a hot-hot-hot medium while the heating sequence of FFF is a hot-cold-hot medium.

June 24, 2021 0 comment
0 FacebookTwitterPinterestEmail
Manufacturing

Why you should definitely use the Hydraulic Press

by Stanley June 15, 2021
written by Stanley

If your intention is to combine metals or plastics, then your best bet will be using a hydraulic press. Just admit it. It is one of the most useful machines in the manufacturing industry.

If you are an advanced user of this machine, this is common knowledge. You might also be used to the tabletop hydraulic press. However, if you are a rookie, you might be wondering what is so special about the hydraulic press.

This article will discuss some of the main benefits you will definitely get from using this machine.

Top Benefits of the Hydraulic Press

1. Flexibility

The first thing that is going to scream amazing with this machine is its flexibility. With the hydraulic press, you can pretty much do everything. The machine allows you to use up and down acting to carry several modes of operation. The multi-action is also available with the hydraulic press.

This means that users get a variety of options to choose from. That is incredible in its own right.

2. Low maintenance

For some people, it’s not about the price of buying these machines, it’s what it takes to actually maintain the machines.

When it comes to a hydraulic press, this isn’t a problem. Hydraulic presses are pretty easy to maintain. This combined with the efficiency of this makes it a very appealing option for companies.

You get similar results if you also use mechanical and eccentric presses. However hydraulic press just edges the competition.

3. Longer lifespan

One of the major problems is usually the tooling of the press. This is because of the amount of stress that tooling has to face. However, with hydraulic press machines, things are a bit different.

It comes with a relief valve. This valve is usually present in the circuit of the press machine.

It relieves some of the stress and pressure that the hydraulic press has to endure. That makes everything so much more bearable.

4. Size

One of the benefits that are often overlooked is the size of hydraulic press machines. They are way smaller when compared to other forms of machines.

For example, a mechanical press is said to occupy twice the amount of floor space that a hydraulic press machine occupies.

This means that with these machines, you get to save a ton of space. That space can be utilized for something much more important.

It’s definitely a win for you.

So how can you get Hydraulic Press Machines?

So, are you ready to make the leap and buy your first machine? If you are, then you will be much better off getting it directly from the manufacturer.

It’s just an easier process. Plus, the machines will be way cheaper than when you get them from a third machine.

It’s definitely worth considering.

Bottom Line

So there you have it! Hydraulic press machines are crucial for the growth of a manufacturing company.

Thus, if you are ready to make the leap, doing some research will definitely get you on the right track.

It’s a decision that you definitely won’t regret.

June 15, 2021 0 comment
0 FacebookTwitterPinterestEmail
Manufacturing

Finding Solutions for Cold Forging Defects

by Stanley May 26, 2021
written by Stanley

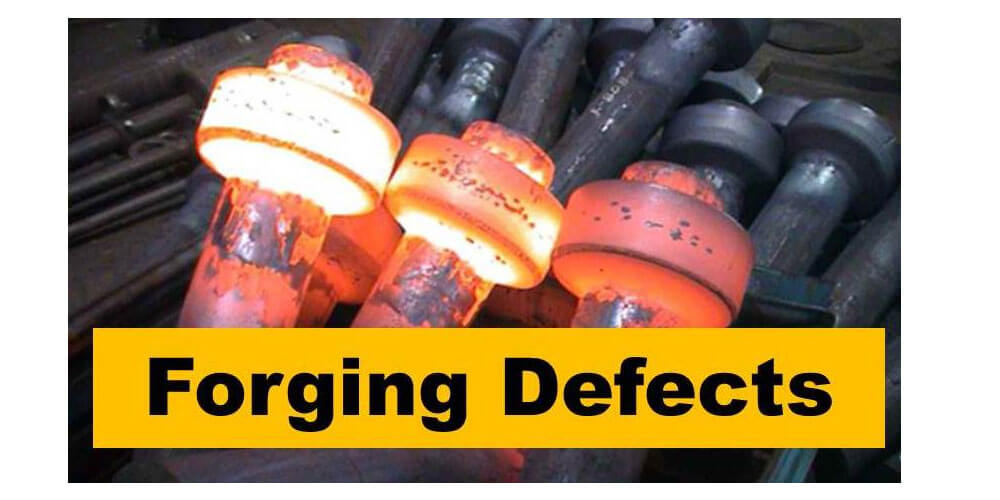
Metallic components are involved in defects during forging, a process that occurs when a metal is heated. It is then shaped using a plastic deformation process. A compressive force is applied in the form of a hammer blow. You can use a hammer press to achieve the desired results. Forging plays an instrumental role in refining grain structures. It also refines the metal’s physical form. If you want to learn more about forging defects, go to website.

Proper Design Features

With the appropriate design, the flow of grains can quickly get oriented to follow the precise application’s principal stresses. Your metal’s grain flow is the existing pattern of the crystals’ direction during plastic deformation.

Physical properties like ductility and strength are also better in a cold forging than in casting metal with crystals’ random orientation. Defects often occur in various components when cold forging is identified after completing the process.

Imperfections in forging

An expert can consider imperfections to be a defect that may range from traceable ones to those caused by post-forging. In many cases, defects are defined as certain imperfections exceeding some limits. That said, some imperfections may not even get classified as defects. This is because they are slightly smaller than the allowances found in applicable specifications.

Then there are differences allowed on forging surfaces. They also vary depending on the type of material subjected to forging. This area needs a lot of attention. In particular, attention should focus on remedial measures to reduce the rate of rejection in forging processes.

  1. Additional forging defects include
  2. Unfilled sections
  3. Scale pits
  4. Flakes
  5. Residual stresses in the metal
  6. A shift in die

Determining the extent of the defect in metal forging

First note, to determine the extent of defect, the result should indicate the company’s rejection rate. Usually, on the positive side, over 5% of the productions are made every month. Some of the common defects include quench cracks, scales, lapping, and mismatch.

There is a need to reduce the rejection rates that come with high defects. To do this, you need to know the proper remedial actions to use. They include coating and venting to help prevent the underfilling of a given metal type and the software simulation. That way, it becomes easy to determine the actual material flow of the processes.

Remedial actions for forging defects

Manufacturers can use several remedial methods to solve forging defects. But the Six-Sigma is one of the best set of techniques in the industry. Developed by the famous Motorola, the process addresses defects’ causative agents while guaranteeing the desired results. It helps improve the quality of metal forged and the processing period.

The enhanced approach delivers productive results, profitability, in addition to quality improvement. These are based on the high-value method. Besides, Six-Sigma is adaptable by several companies, given its proven benefits in reducing the cost of production for small scale industries.

The Greek letter represents the deviation between various process means and their nearest specifications designated in sigma units. The method is used to determine the actual defects in metal forging while finding solutions for them.

Final Thoughts

Defects are imperfections. They are common in various manufacturing processes, such as casting. In forging, defects can be caused by the processes involved and the limitations of the operators. But there is always a solution to every flaw. That is what every manufacturer should focus on establishing.

May 26, 2021 0 comment
0 FacebookTwitterPinterestEmail
Manufacturing

How to Make Small Model Trees

by Stanley March 11, 2021
written by Stanley

When it comes to making model trees, a certain amount of time is consumed in the process. While some can take between 5 to 10 minutes to complete, offers may require 4 to 5 hours. At the end of the day, knowing how to make tree models for architecture is essential. Why? Because every layout needs about 50 to 100 of it to attain a populated look.

This article shows the standard method of making small model trees for any layout of your choice!

How to Make Small Model Trees

Step 1: Making the Foliage

When making the foliage, you need to get a material that you can easily turn into a crown-like form. This crown will help you hold the tree in shape since it may not have branches. One material that can fit this purpose is a bathroom or kitchen sponge preferably a deep green one.

Using scissors or any other sharp object, cut and carve the sponge into your preferred tree shape. If you’re confused about what to do, look at the natural trees in your surroundings; then pick an inspiration.

Note, you may not get the cut perfectly right if you’re trying for the first time. But with continuous efforts, it gets better. For a smoother appearance, use a tweezer and take out the small pieces that are straying.

Step 2: Making the Trunk

Creating the trunk is quite easy. All you need to do is find slightly tapered twigs with collars. This will be used to create the impression of broken shoots of the tree. Remember to cut the twig just beneath the collar, and glue it to the tree that you’ve created. This should wear a similar look with natural trees like Birch, sycamore, oak, hornbeam, etc.

If you have intentions of showing the main trunk in the tree you’re making, then this technique is great!. But If it’s a low-branch tree with a much visible appearance, twigs with offshoots would be the best option.

Step 3: Finishing

Finish off your model tree by dabbing deeper shades of an acrylic green color or pain in secluded areas of the sponge. To create an illusion of visible leaves, apply hair spray on the sponge and then spread a small quantity of fine green on them.

Step 4: Plant It

The planting is the last part of the making of model trees. You can choose to create small holes In the trunk. Take a PVA glue for wood, and drop them on the base, push the trunk in. To avoid it getting spoilt, support it for a while until the PVA glue finally sets.

Conclusions

This guide takes you through the simple, quick steps to making model trees. With the information contained above, making small model trees will become an easy hurdle to cross. For a first-timer, it may take you a lot of time to get the tree right. But then, you need to keep practicing until you can whip one in a couple of seconds!

March 11, 2021 0 comment
0 FacebookTwitterPinterestEmail
Manufacturing

Knowing about CNC gas cutting machines

by Stanley January 5, 2021
written by Stanley

Whether thick or thin, cutting metal is a job that requires a lot of precision. It is also a job that requires making big decisions. One of them is choosing the type of cutting machines you will use. One of such machines is the CNC gas cutting machine.

In this article, you are going to learn more about the CNC gas cutting machines. This article is also going to discuss the various types of gases you should use with the CNC gas cutting machines.

If you’re ready, it’s time to dive in!

Understanding the CNC gas cutting machines

The process of using the CNC gas-cutting machines is often referred to as oxyfuel cutting. In other words, this process is all about the interaction between oxygen and metal. Once this happened, the result will likely be iron oxide.

The oxyfuel process can either be controlled or being rapid. Once the area meant to be severed has been cut, then oxygen will have to be directed to it in a clear steady stream.

It is worthy of note to mention that the gas cutting machines include both plasma and flame cutting machines. The main difference between both types of processes is that one relies purely on oxygen while the other relies more on electric arcs.

What type of gas is used on CNC gas-cutting machines?

This process is versatile when it comes to the use of gases. Most gas-cutting machines can use gases such as propane, MAPP, acetylene, or natural gas)

The cutting speed and performance is influenced by the type of gas being used. Also, the nozzle used for gas can affect the performance of the entire process. It might be a good idea to keep one eye on the nozzle.

If you are looking for a really high flame, then you should probably use acetylene gas. It can rise to about 3,160 degrees when used at its full potential.

Most people or companies use MAPP when they have to perform an underwater cutting. This is especially helpful if you have to cut under deep waters.

If you want to use natural gas, you have to prepare for some of its drawbacks. One of them is that it has the lowest temperature of all the other gases. Its temperature can only rise to about 2,770. It is also the lowest when it comes to piercing.

Should you buy a gas-cutting machine?

So, how do you know if you need to get a gas-cutting machine? Well, you have to do your research. If you have to cut really thick metals, then this is probably the machine for you.

Most gas-cutting machines will not need to use much power supplies. This ensures that you are not trapped to the whims of power supply. This is probably one of the reasons why gas cutting machines are considered to be very appealing.

Final Thoughts

So there you have it! Understanding everything about gas-cutting machines will ensure that you make the right decision for yourself and your shop.

January 5, 2021 0 comment
0 FacebookTwitterPinterestEmail
Manufacturing

How is the gravure printing method done?

by Stanley December 31, 2020
written by Stanley

If you have been in the printing press business for at least one decade now, you will have noticed that the gravure printing style is one of the favorites. The method isn’t chosen by expert printers simply because it is cost-effective but also because the process is straightforward and requires less effort.

If you are new to gravure printing, you might be interested in finding out what the characteristics are. In thing article, you will see the most prevalent characteristics of the gravure printing process. This article will also show you some of the benefits and some of the downsides of the printing method.

What is gravure printing?

Gravure printing is a method of printing used by the printing press to etch images on substrates like fiber, wood, and others. Gravure printing is done by etching an image on the gravure printing cylinders using cells. The cells on the cylinder are dipped in ink, while the other parts of the cylinder are cleaned to ensure that they don’t stain the substrate.

The characteristics of the gravure printing process

The following are some of the characteristics of the gravure printing process. If you had been using the process, you should be aware of some or all of these by now:

1. High quality

Anyone who has used gravure as a printing method knows that the level of line clarity and richness on layers are incomparable. The printing method uses a lot of ink and offers convex graphics that offers a great feel.

2. Applicable for several surfaces

There are very few limits to what you can print on with gravure printing. The printing process can be done on surfaces like plastic, wood, fiber, paper, aluminum foil, textile materials, and several others. It even works best on foldable, stretchable, and contractible materials.

3. Best for mass printing

One of the reasons why gravure printing is more preferred to other printing methods is because of its ability to carry out lots of tasks in the long run. If you are into printing large quantities, this is the printing method you should be getting into.

4. The machine is durable

You can’t take away durability from the gravure printing process. This is one of the many reasons why the gravure printing process is majorly used for long term printing jobs. The spare parts are strong and are easy to find in the market. They will also not cost you so much to repair. From setting up to the entire printing process, you will find it very straightforward.

5. Almost completely automated

You have only very little to do once you are all set up. The gravure printing process does most of the work for you.

Gravure printing also has some downsides, like not being suitable for short-term printing jobs. Not that you cannot use it but because it would consume a lot of ink.

Conclusion

Gravure printing is a trending printing method that every printing press should focus their energy on because it offers more advantages than disadvantages.

December 31, 2020 0 comment
0 FacebookTwitterPinterestEmail
Manufacturing

Defining the Essentials of Prototyping Manufacturing

by Stanley November 19, 2020
written by Stanley

When it comes to creating a prototype, you have fun while converting your vision into a three-dimensional version. As technology continues to give manufacturers chances to impress the market, prototype manufacturing through prototype manufacturing companies continues to offer you the best work experience through its innovations. Take a look at the basics of prototyping manufacturing in different sectors.

Companies like Wayken who have taken steps to create prototypes for different clients have had opportunities to knock into their creativity. Prototype manufacturing allows you to use your exceptional skills to inspire your innovative ideas. Whether you are hiring a machinist’s services or creating the prototype at home, it’s a beautiful feeling to witness your vision transforming into a tangible product.

How Should a Prototype Appear?

Generally, how a prototype looks like depends on the following;

  • Your goal
  • Your budget
  • Your idea

However, when creating a prototype, it is advisable to start by hand-making your thought. For instance, try molding one from household items such as socks, empty milk containers, etc. A homemade presentation will offer you a good start. Also, you get ideas on how to achieve your creation once you get the required materials successfully.

Once you have your idea, move forward, and professionally put your innovation into reality. If you plan to manufacture it by yourself, you may need a pre-production prototype.

Prototype Applications

There are various prototype machining applications. They are used in different areas, including;

  • Engineering prototypes
  • Master patterns
  • Visual models
  • Metal prototypes
  • Production – Grade plastic prototypes
  • Prototyping oversized parts
  • Fixtures and tools
  • Low-volume manufacturing
  • Market study model
  • Customer Evaluation

How to Develop a Prototype?

Taking a step to create a prototype before presenting your idea is a vital move. But how do you move forward and achieve your goals? After spending time thinking about whether you can do it or not, it’s time to move to the next level by asking yourself how you will progress.

The best part about hand making your prototype is you’ll have a great time bringing your product to life. At this stage, you have no rules. Take the materials around your house and use them to test if your idea will work.

Knowing the materials, you wish to create your prototype from is essential. Whether it’s plastic, chemicals, textiles, or metal, ensure practicing at home before moving forward. No matter the material you intend to use, be open to alternatives you may not have considered.

For example, if you decide to use plastic, ask yourself why. Then, consider using metal or any other available material and see if your idea turns out great.

Putting your ideas into reality means exploring different means to make it happen. Never stick to one material when creating your prototype. You’ll never know how another material transforms your thought.

Getting the Help, You Need

Now that you have made the right choice of the material you wish to use, it’s time to get the help you need to develop your prototype. You may hire designers, engineers, or prototype developers. If you want, machinists or handymen can assist you.

Once you have your team, split your budget into labor and materials. No matter who you choose to assist you, select the best services. Research on the best technology to use in your prototype development to give the best to the market.

In conclusion

Always use any chance you get to explore many solutions that may better your idea. Regardless of your thoughts, use all your creativity to go beyond your capabilities. While the market awaits to use your imagination, prove your worth by delivering the best!

November 19, 2020 0 comment
0 FacebookTwitterPinterestEmail
Newer Posts
Older Posts

Copyright All rights reserved.


Back To Top
truesourcesoftware.com
  • Home
  • Technology
  • About Us
  • Contact Us
  • Resource
  • Terms of Service
  • Write for Us