truesourcesoftware.com
  • Home
  • Technology
  • About Us
  • Contact Us
  • Resource
  • Terms of Service
  • Write for Us
Home - Archives for Stanley - Page 3
Author

Stanley

Stanley

Manufacturing

Is There a Difference Between FDM and FFF?

by Stanley June 24, 2021
written by Stanley

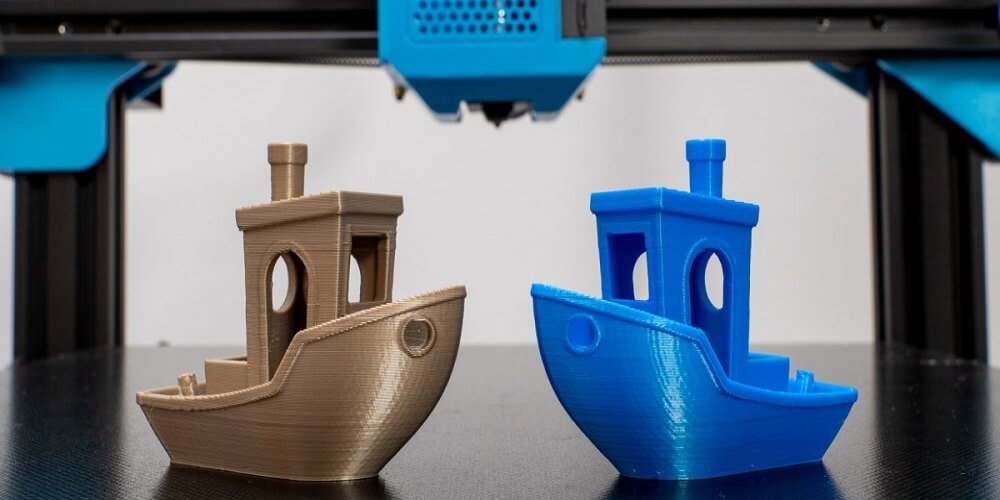
The confusion between Fused deposition modeling (FDM) and Fused Filament Fabrication has been on for a while now.

People keep wondering if they are the same. Some say they are, but others disagree and say they are different. The only way to find the answer is to look at the details.

In matters like this, it is always best to go back in time to see where each of these organizations started, to know how they have progressed over the years, their similarities, and their differences.

Putting the working principle of both processes before all is a good way to determine the differences and similarities. It will also compare the quality of their products.

Fused Deposition Modeling (FDM)

The FDM belongs to Stratasys, Ltd. Stratasys patented this technology in 1989. The well-known FDM machine a nozzle assembly, a table or built-platform, and a material filament.

when the filament enters the extruder, the extruder heats it with temperatures reaching 320 degrees Celsius. until it melts.

The filament then comes out through the nozzle and is carefully and selectively layered on the build platform.

The whole process of heating and melting and layering through a nozzle is isolated from the ambient environment.

The 3D printing process is built to maintain the temperature of the thermoplastic material that is used to print out 3D designs.

The temperature maintenance is done in order not to cause any structural damage that can result from sudden cooling damage to the design.

Fused Filament Fabrication (FFF)

When the FDM patent expired in 2009, a group came up to start manufacturing their version of 3D printers that FDM previously had.

This group called their equipment the Fused Filament Fabrication.

The purpose of the group that came up with FFF was to enable complex products to be manufactured without any industrial infrastructure set up.

They wanted people to be able to create complex components without big manufacturing bodies getting involved and using their industrial machinery to further it.

The FFF made a few changes in the design of their machine. The FDM used the process of heating the whole print chamber. The FFF did away with that part of the machine to save cost.

This meant that in the FFF, the filament goes through a hot extruder, then through an ambient environment, and then to a cold table.

The sequence of a hot to cold to hot pattern caused residual stresses in the model that was printed.

Conclusion

Back to the question. Are FDM and FFF the same technology? Well, yes. But that does not mean that they are the same thing.

They are both very similar but maintain some differences. Even though the FFF and FDM have the same architectural processes, the major difference is the output quality.

There is an obvious difference in the quality of their products. This is a result of the heating sequence in the different printers.

The FDMs heating sequence is a hot-hot-hot medium while the heating sequence of FFF is a hot-cold-hot medium.

June 24, 2021 0 comment
0 FacebookTwitterPinterestEmail
Manufacturing

Why you should definitely use the Hydraulic Press

by Stanley June 15, 2021
written by Stanley

If your intention is to combine metals or plastics, then your best bet will be using a hydraulic press. Just admit it. It is one of the most useful machines in the manufacturing industry.

If you are an advanced user of this machine, this is common knowledge. You might also be used to the tabletop hydraulic press. However, if you are a rookie, you might be wondering what is so special about the hydraulic press.

This article will discuss some of the main benefits you will definitely get from using this machine.

Top Benefits of the Hydraulic Press

1. Flexibility

The first thing that is going to scream amazing with this machine is its flexibility. With the hydraulic press, you can pretty much do everything. The machine allows you to use up and down acting to carry several modes of operation. The multi-action is also available with the hydraulic press.

This means that users get a variety of options to choose from. That is incredible in its own right.

2. Low maintenance

For some people, it’s not about the price of buying these machines, it’s what it takes to actually maintain the machines.

When it comes to a hydraulic press, this isn’t a problem. Hydraulic presses are pretty easy to maintain. This combined with the efficiency of this makes it a very appealing option for companies.

You get similar results if you also use mechanical and eccentric presses. However hydraulic press just edges the competition.

3. Longer lifespan

One of the major problems is usually the tooling of the press. This is because of the amount of stress that tooling has to face. However, with hydraulic press machines, things are a bit different.

It comes with a relief valve. This valve is usually present in the circuit of the press machine.

It relieves some of the stress and pressure that the hydraulic press has to endure. That makes everything so much more bearable.

4. Size

One of the benefits that are often overlooked is the size of hydraulic press machines. They are way smaller when compared to other forms of machines.

For example, a mechanical press is said to occupy twice the amount of floor space that a hydraulic press machine occupies.

This means that with these machines, you get to save a ton of space. That space can be utilized for something much more important.

It’s definitely a win for you.

So how can you get Hydraulic Press Machines?

So, are you ready to make the leap and buy your first machine? If you are, then you will be much better off getting it directly from the manufacturer.

It’s just an easier process. Plus, the machines will be way cheaper than when you get them from a third machine.

It’s definitely worth considering.

Bottom Line

So there you have it! Hydraulic press machines are crucial for the growth of a manufacturing company.

Thus, if you are ready to make the leap, doing some research will definitely get you on the right track.

It’s a decision that you definitely won’t regret.

June 15, 2021 0 comment
0 FacebookTwitterPinterestEmail
Prototype

Available Technologies for Rapid Prototyping

by Stanley June 10, 2021
written by Stanley

3D prototyping or rapid prototyping is a process of product manufacturing that involves the fast manufacturing of a physical prototype. The prototype is altered in every step to make it better until one that production worthy is developed. Rapid prototyping is time and cost-effective, thanks to the introduction of digital technologies. Different materials with varying properties are used based on several factors, such as what a client wants. In this article, we discuss the rapid prototyping technologies available for use in various applications.

Rapid Prototyping Techniques

There are several 3D prototyping techniques available, but we will expound on the three main ones below.

1. 3D Printing

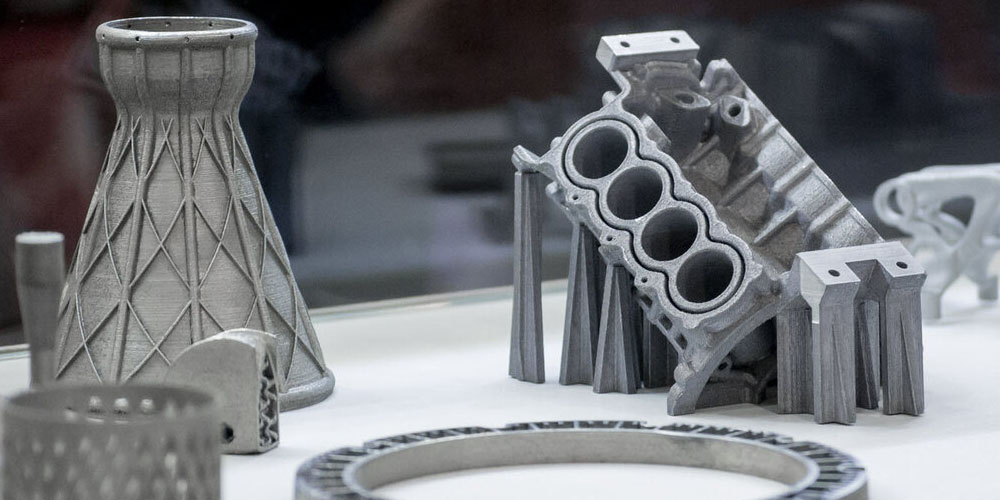
It is an additive manufacturing process whereby materials are added in layers until the desired shape or form is achieved. The most common application for this technique is rapid prototyping which provides flexibility in terms of materials and speed used to create the prototypes. 3D is known for producing objects at a low cost; however, it’s not ideal for the mass production of items. 3D printing is divided into three depending on the accuracy level, i.e., fused deposition modeling (FDM), Stereolithography(SLA), and Selective laser sintering (SLS).

FDM printing process is the most common and is ideal for use at home or first-run prototypes. Stereolithography is suitable for prototypes with a higher resolution, and SLS is suitable for industrial prototypes since its more specialized than the rest. Examples of applications that use 3D printing include engineering, jewelry design, and architecture.

2. CNC Milling

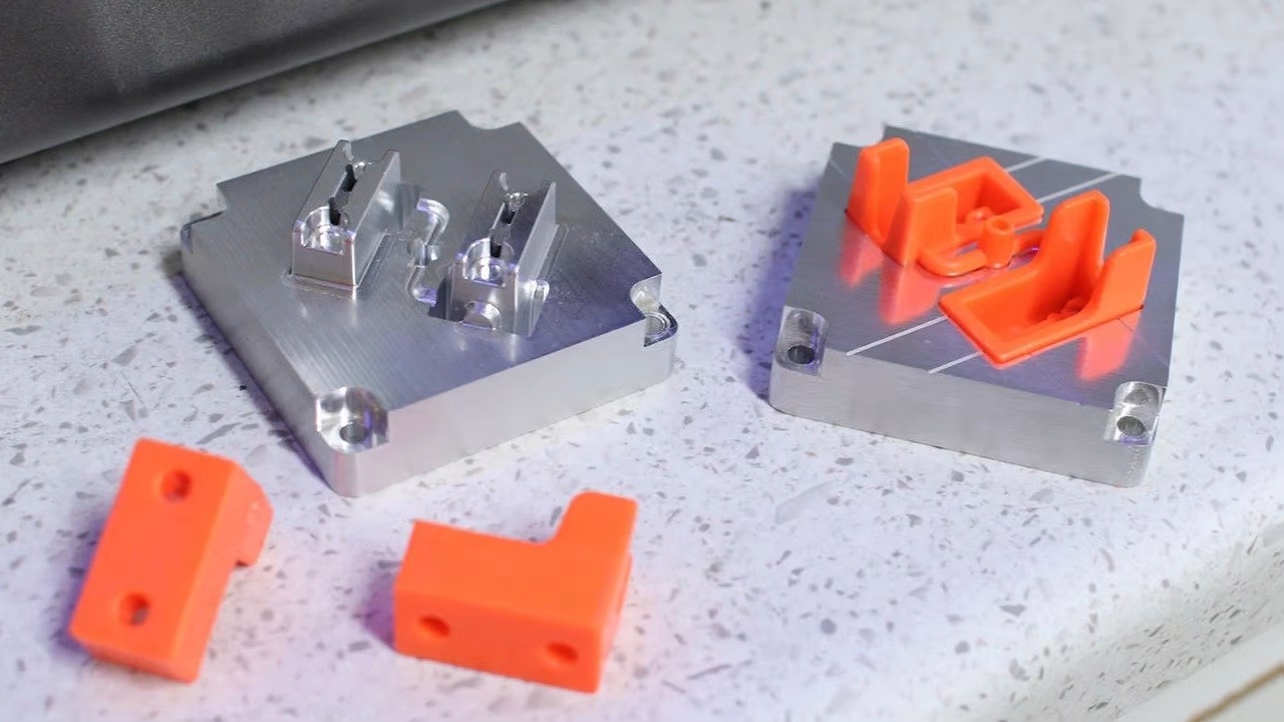
It is a subtractive technology used in rapid prototyping to develop objects. It involves a cutting tool that cuts on different materials ranging from glass, metal, plastics, and wood. It is a versatile process since it allows all types of cuts on materials, and 3D models can be created from the software and later exported into a format compatible with CNC.

The materials are then placed on the work table, and the mill works on it with reference to the 3D digital model. CNC milling uses cutting tools to make parts into a single item or develops a prototype with several parts and serve the same purpose. This prototyping process is suitable for industries and applications such as medicine, aerospace, aviation, and automotive.

3. Laser Cutting and Engraving

The process applies subtractive manufacturing to produce objects. A laser beam helps to cut precise parts with varying thicknesses with high speed. The parts are usually made from different materials like wood, acrylic, and metal sheets which are later added to details using laser engraving to make the prototype complete. The process can also accommodate hard materials like aluminum, carbon steel, and stainless steel, and some manufacturing industries offer this service to clients. The possibility of using different materials makes laser cutting suitable for use in industries like aerospace, automotive, and the military.

Final Words

Rapid prototyping involves many techniques applicable in multiple industries. Any concept design can be developed into a physical prototype using the correct process and materials.

June 10, 2021 0 comment
0 FacebookTwitterPinterestEmail
Molding

The Process Of Creating A Sand Casting Mold

by Stanley June 1, 2021
written by Stanley

Sand casting is the oldest casting technique in the market, as it can be traced back to as early as 1000 B.C. This method led to the birth of other casting techniques like metal casting. In sand casting, sand is used to create the mold where the molten metal is poured. Despite the development of several other casting techniques, sand casting remains to be the most widely used and the most versatile method in existence. The process of sand casting starts with the design then the creation of the sand casting mold. This post will focus on the creation of sand casting molds.

How to create a sand casting mold

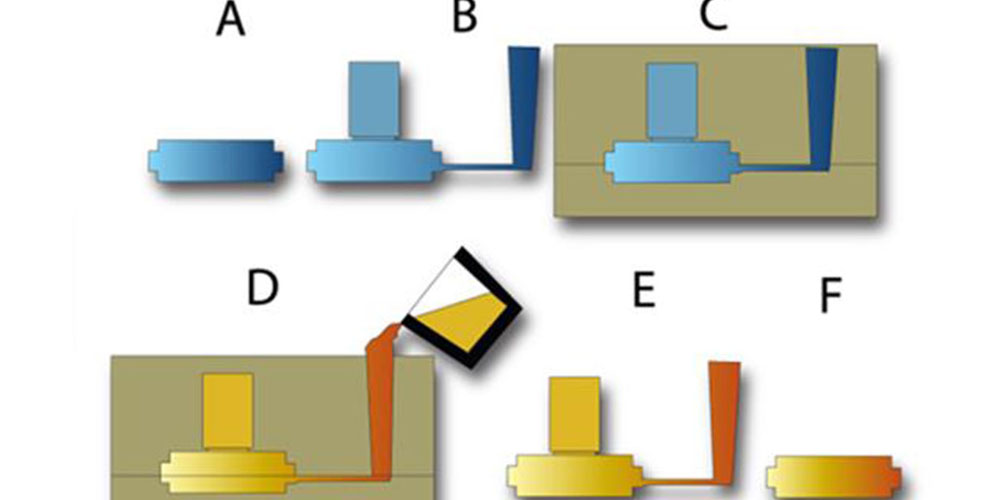
Creating the mold is one of the most critical steps of the sand casting process. For the sand casting mold to be made, you need to begin by making the foundry pattern known as the design. Once the pattern is completed, you can start creating the mold.

You will need refractory material for the process. The refractory material needs to be stable at high temperatures. It must also be strong enough to handle the weight of the molten material during the part formation. It must also be brittle enough to be broken away from the solidified metal or material after cooling the cast. The material, which in this case is sand, is formed around the pattern. In sand casting, varieties of sand can be used. In most cases, the sand used is combined with other materials like a bonding agent. Doing this helps strengthen the sand so that it can withstand the pouring process without getting displaced.

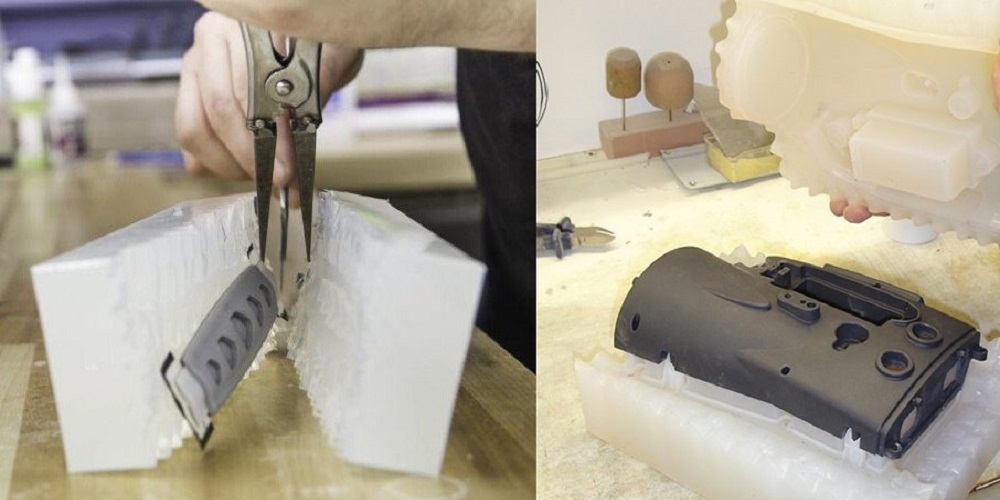
The sand casting mold is usually made in two pieces. The top piece is known as the cope, while the bottom or second piece is the drag. This allows for the separation and removal of the pattern. In some instances, the mold can include cores. This is essential in areas where the final product features internal passageways.

Creating the sand casting mold is as easy as firmly packing sand into each pattern. The firmness is meant to prevent any loose sand. This can be done by hand or machine. After the sand filled into the pattern, the patterns are removed. Doing this leaves the exterior contours in the sand. These are the parts where channels and connections known as gates or runners are created. These parts are essential for accuracy in the sand casting process. They allow the metal to enter all corners of the mold.

After the sand casting mold is created, a refractory coating can be added to it. Doing this helps create a better surface finish. It also protects the mold from the turbulence caused by the molten metal when it is being poured. The two halves are placed together before the molten metal is poured into the sand casting mold. Doing this creates a cavity in the shape of the desired final part.

Final word

It is worth mentioning that the mold can also be created via the machining of the desired shaped cavity directly onto the sand. This is a popular technique because it allows you to manage and implement changes to the design effortlessly.

June 1, 2021 0 comment
0 FacebookTwitterPinterestEmail
Manufacturing

Finding Solutions for Cold Forging Defects

by Stanley May 26, 2021
written by Stanley

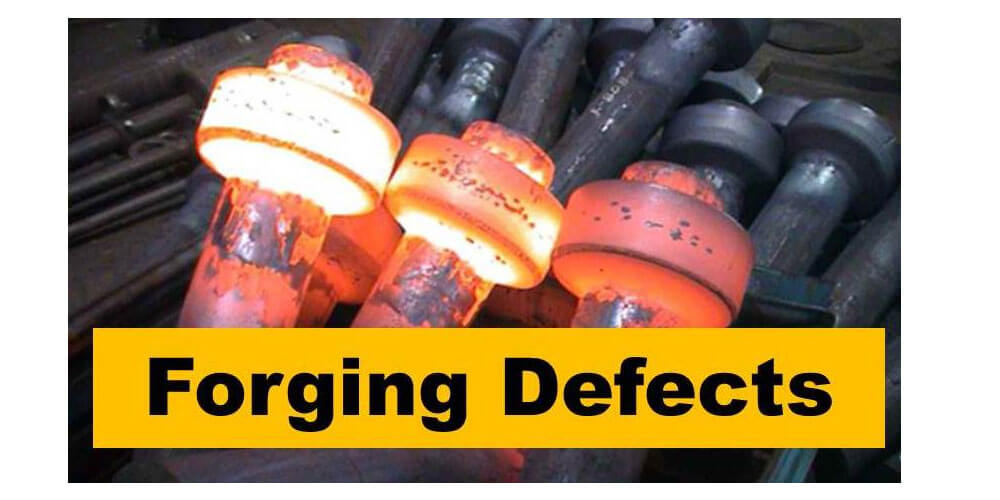
Metallic components are involved in defects during forging, a process that occurs when a metal is heated. It is then shaped using a plastic deformation process. A compressive force is applied in the form of a hammer blow. You can use a hammer press to achieve the desired results. Forging plays an instrumental role in refining grain structures. It also refines the metal’s physical form. If you want to learn more about forging defects, go to website.

Proper Design Features

With the appropriate design, the flow of grains can quickly get oriented to follow the precise application’s principal stresses. Your metal’s grain flow is the existing pattern of the crystals’ direction during plastic deformation.

Physical properties like ductility and strength are also better in a cold forging than in casting metal with crystals’ random orientation. Defects often occur in various components when cold forging is identified after completing the process.

Imperfections in forging

An expert can consider imperfections to be a defect that may range from traceable ones to those caused by post-forging. In many cases, defects are defined as certain imperfections exceeding some limits. That said, some imperfections may not even get classified as defects. This is because they are slightly smaller than the allowances found in applicable specifications.

Then there are differences allowed on forging surfaces. They also vary depending on the type of material subjected to forging. This area needs a lot of attention. In particular, attention should focus on remedial measures to reduce the rate of rejection in forging processes.

  1. Additional forging defects include
  2. Unfilled sections
  3. Scale pits
  4. Flakes
  5. Residual stresses in the metal
  6. A shift in die

Determining the extent of the defect in metal forging

First note, to determine the extent of defect, the result should indicate the company’s rejection rate. Usually, on the positive side, over 5% of the productions are made every month. Some of the common defects include quench cracks, scales, lapping, and mismatch.

There is a need to reduce the rejection rates that come with high defects. To do this, you need to know the proper remedial actions to use. They include coating and venting to help prevent the underfilling of a given metal type and the software simulation. That way, it becomes easy to determine the actual material flow of the processes.

Remedial actions for forging defects

Manufacturers can use several remedial methods to solve forging defects. But the Six-Sigma is one of the best set of techniques in the industry. Developed by the famous Motorola, the process addresses defects’ causative agents while guaranteeing the desired results. It helps improve the quality of metal forged and the processing period.

The enhanced approach delivers productive results, profitability, in addition to quality improvement. These are based on the high-value method. Besides, Six-Sigma is adaptable by several companies, given its proven benefits in reducing the cost of production for small scale industries.

The Greek letter represents the deviation between various process means and their nearest specifications designated in sigma units. The method is used to determine the actual defects in metal forging while finding solutions for them.

Final Thoughts

Defects are imperfections. They are common in various manufacturing processes, such as casting. In forging, defects can be caused by the processes involved and the limitations of the operators. But there is always a solution to every flaw. That is what every manufacturer should focus on establishing.

May 26, 2021 0 comment
0 FacebookTwitterPinterestEmail
Prototype

Why You Should Use 3D Printing Prototypes

by Stanley May 6, 2021
written by Stanley

Having to create prototypes can be quite a slow and expensive process. But this is slowly going extinct as there are certain techniques such as 3D printing that can help you improve on your product development. Not just that, but you will also make high-quality product prototypes while at it. 3D custom machining has tons of benefits that beat the traditional processes of printing.

Some of the benefits of 3D printing may include reduced waste, lower costs, and speed to market. Stick to this article to find out more:

Advantages of 3d printing prototypes

1. It Gets To the Market Faster

Most consumers enjoy products that work specifically to their lifestyle. For example, runners’ perfect lighter shoes, gamers want to enjoy life experiences, etc. Your duty as a manufacturer is to ensure that product prototypes get to the consumers at a faster speed. How do you achieve this? By employing a system with better intelligence and processor to make this possible.

With 3D printing, consumers can get to taste a product quickly.

  1. Saves Costs

There are fixtures and tools, which are essential parts that engineers in charge of manufacturing products create. To handle particular issues faced by factories, these tools are specially made. These 3D printing tools are used to replace those that break during production. This ensures that you save time and cost because creating tools that would replace those that broke would take a lot of time

3. It Aids In the Reduction of Waste

3D printing reduces waste by making use of additive manufacturing. From the automotive industry, several car parts are created using CNC machining processes. These are known as manufacturing subtractive. While different parts start as a block of either steel or aluminum, other tools get rid of materials till the final product is completed. This manufacturing process ends up increasing the cost, using more resources, and wasting more time. Using 3D printing, all these wastes are eliminated, time is saved, and clean-up occurs faster.

4. Improves the lives of people

People in need of artificial limbs can also get them from 3D printers. Prosthetics like they are popularly known refer to sophisticated, complex systems which are created to replace the human body. For them to work well in a person’s body system, prosthetics should go through a standard process of production.

Therefore, 3D printing is used to create artificial limbs. This way they can be customized to suit a client’s taste.

5. Weight is Saved Using Part Complex Designs

A lot of aerospace companies have been searching for ways to reduce the weight of planes. Using 3D printing, more ounces could be saved, and more passengers and cargo can get into the planes.

Final Thoughts

At the end of the day, manufacturing helps to drive innovation and sparks technologies. Looking at its impact since it started, the advantages of 3D printing would keep expanding as time goes on. Who knows what 3D printing in the future has to offer? It could start creating prosthetic organs and Nano cells.

May 6, 2021 0 comment
0 FacebookTwitterPinterestEmail
Molding

How does the CNC Milling Machine Work?

by Stanley April 9, 2021
written by Stanley

For a milling machine to function effectively as a whole, all the parts must be up and running. The secret to keeping a healthy machine part is to make sure you get high quality when making purchases at first.

China CNC milling Services is one of such companies that offer high-quality milling services including quality parts. It is not enough to know where to get high-quality parts. As a knowledgeable consumer, you should be duly aware of their functions as well hence the essence of this blog.

Example of parts that are indispensable in a milling machine includes

Frame

The frame offers support to the total setup and helps it remain rigid and stable. Usually, it consists of a base and one or more columns that can be detached.

The headstock is one of the most essential parts of a frame although most times its importance is ignored. Spindles are set up on headstocks and if not properly placed could result in vibrations during operations.

Spindle

This part is popularly known as the “heart” of the machine and can be horizontally or vertically placed depending on the type of machine. It is made up of a rotating assembly and a section for the positioning of tool holders.

The tool holder is used to attach the shaft of a spindle to the tool. To promote the longevity of a spindle, you should apply lubricants when necessary to reduce the effects of fiction.

Table

The table serves as a solid base for clamping the workpiece. To make clamping easier, most tables use T-slots. If the CNC milling machine is horizontally designed, It would include pallets together with Tap-holes.

This makes it easier for an operator to move parts to be machined across the table. Magnets are also used in some cases to secure clamps. To avoid the loss of the Z-axis, engineers preferably attached the magnets to the machine tables.

CNC Control Panel

The control panel performs the same function as the nervous system in a human body. It harbors the electronics that control various activities in the machine.

The CNC monitor and programming buttons are also part of the control panel. Their main function is to input codes and data. In every setup, the control panel is placed within reach so that it can be easily accessed.

Axes

Basically, CNC milling machines all have the X/Y/Z axes. In addition to these, a rotational axis of C /A or B is included depending on the machine’s configuration. For programming, the g-code in the CNC controller is often utilized.

Tool/ Tool Changers

Usually, tool changers are attached to the column or mounted separately to the milling machine. Those attached separately are preferred if the machine needs large tool changers.

This method is easier and saves more time. It also helps engineers prevent excess vibrations that are not necessarily needed.

Tool holders

Although tool holders come in various sizes, the standard size is BT 30 to BT 40 and BT 50. Different tool holders have different applications and therefore a particular one may not be suitable for all machines.

For better rigidity and balance, operators are advised to use the BBT versions which is an improved version of the standard BT. With BBT versions, connections and bonds are stronger because it provides double contact points.

Conclusion

Apart from the ones discussed above, there are other components of a mining machine. But these are the vital ones without which the machine cannot function.

April 9, 2021 0 comment
0 FacebookTwitterPinterestEmail
Manufacturing

How to Make Small Model Trees

by Stanley March 11, 2021
written by Stanley

When it comes to making model trees, a certain amount of time is consumed in the process. While some can take between 5 to 10 minutes to complete, offers may require 4 to 5 hours. At the end of the day, knowing how to make tree models for architecture is essential. Why? Because every layout needs about 50 to 100 of it to attain a populated look.

This article shows the standard method of making small model trees for any layout of your choice!

How to Make Small Model Trees

Step 1: Making the Foliage

When making the foliage, you need to get a material that you can easily turn into a crown-like form. This crown will help you hold the tree in shape since it may not have branches. One material that can fit this purpose is a bathroom or kitchen sponge preferably a deep green one.

Using scissors or any other sharp object, cut and carve the sponge into your preferred tree shape. If you’re confused about what to do, look at the natural trees in your surroundings; then pick an inspiration.

Note, you may not get the cut perfectly right if you’re trying for the first time. But with continuous efforts, it gets better. For a smoother appearance, use a tweezer and take out the small pieces that are straying.

Step 2: Making the Trunk

Creating the trunk is quite easy. All you need to do is find slightly tapered twigs with collars. This will be used to create the impression of broken shoots of the tree. Remember to cut the twig just beneath the collar, and glue it to the tree that you’ve created. This should wear a similar look with natural trees like Birch, sycamore, oak, hornbeam, etc.

If you have intentions of showing the main trunk in the tree you’re making, then this technique is great!. But If it’s a low-branch tree with a much visible appearance, twigs with offshoots would be the best option.

Step 3: Finishing

Finish off your model tree by dabbing deeper shades of an acrylic green color or pain in secluded areas of the sponge. To create an illusion of visible leaves, apply hair spray on the sponge and then spread a small quantity of fine green on them.

Step 4: Plant It

The planting is the last part of the making of model trees. You can choose to create small holes In the trunk. Take a PVA glue for wood, and drop them on the base, push the trunk in. To avoid it getting spoilt, support it for a while until the PVA glue finally sets.

Conclusions

This guide takes you through the simple, quick steps to making model trees. With the information contained above, making small model trees will become an easy hurdle to cross. For a first-timer, it may take you a lot of time to get the tree right. But then, you need to keep practicing until you can whip one in a couple of seconds!

March 11, 2021 0 comment
0 FacebookTwitterPinterestEmail
Manufacturing

Knowing about CNC gas cutting machines

by Stanley January 5, 2021
written by Stanley

Whether thick or thin, cutting metal is a job that requires a lot of precision. It is also a job that requires making big decisions. One of them is choosing the type of cutting machines you will use. One of such machines is the CNC gas cutting machine.

In this article, you are going to learn more about the CNC gas cutting machines. This article is also going to discuss the various types of gases you should use with the CNC gas cutting machines.

If you’re ready, it’s time to dive in!

Understanding the CNC gas cutting machines

The process of using the CNC gas-cutting machines is often referred to as oxyfuel cutting. In other words, this process is all about the interaction between oxygen and metal. Once this happened, the result will likely be iron oxide.

The oxyfuel process can either be controlled or being rapid. Once the area meant to be severed has been cut, then oxygen will have to be directed to it in a clear steady stream.

It is worthy of note to mention that the gas cutting machines include both plasma and flame cutting machines. The main difference between both types of processes is that one relies purely on oxygen while the other relies more on electric arcs.

What type of gas is used on CNC gas-cutting machines?

This process is versatile when it comes to the use of gases. Most gas-cutting machines can use gases such as propane, MAPP, acetylene, or natural gas)

The cutting speed and performance is influenced by the type of gas being used. Also, the nozzle used for gas can affect the performance of the entire process. It might be a good idea to keep one eye on the nozzle.

If you are looking for a really high flame, then you should probably use acetylene gas. It can rise to about 3,160 degrees when used at its full potential.

Most people or companies use MAPP when they have to perform an underwater cutting. This is especially helpful if you have to cut under deep waters.

If you want to use natural gas, you have to prepare for some of its drawbacks. One of them is that it has the lowest temperature of all the other gases. Its temperature can only rise to about 2,770. It is also the lowest when it comes to piercing.

Should you buy a gas-cutting machine?

So, how do you know if you need to get a gas-cutting machine? Well, you have to do your research. If you have to cut really thick metals, then this is probably the machine for you.

Most gas-cutting machines will not need to use much power supplies. This ensures that you are not trapped to the whims of power supply. This is probably one of the reasons why gas cutting machines are considered to be very appealing.

Final Thoughts

So there you have it! Understanding everything about gas-cutting machines will ensure that you make the right decision for yourself and your shop.

January 5, 2021 0 comment
0 FacebookTwitterPinterestEmail
Manufacturing

How is the gravure printing method done?

by Stanley December 31, 2020
written by Stanley

If you have been in the printing press business for at least one decade now, you will have noticed that the gravure printing style is one of the favorites. The method isn’t chosen by expert printers simply because it is cost-effective but also because the process is straightforward and requires less effort.

If you are new to gravure printing, you might be interested in finding out what the characteristics are. In thing article, you will see the most prevalent characteristics of the gravure printing process. This article will also show you some of the benefits and some of the downsides of the printing method.

What is gravure printing?

Gravure printing is a method of printing used by the printing press to etch images on substrates like fiber, wood, and others. Gravure printing is done by etching an image on the gravure printing cylinders using cells. The cells on the cylinder are dipped in ink, while the other parts of the cylinder are cleaned to ensure that they don’t stain the substrate.

The characteristics of the gravure printing process

The following are some of the characteristics of the gravure printing process. If you had been using the process, you should be aware of some or all of these by now:

1. High quality

Anyone who has used gravure as a printing method knows that the level of line clarity and richness on layers are incomparable. The printing method uses a lot of ink and offers convex graphics that offers a great feel.

2. Applicable for several surfaces

There are very few limits to what you can print on with gravure printing. The printing process can be done on surfaces like plastic, wood, fiber, paper, aluminum foil, textile materials, and several others. It even works best on foldable, stretchable, and contractible materials.

3. Best for mass printing

One of the reasons why gravure printing is more preferred to other printing methods is because of its ability to carry out lots of tasks in the long run. If you are into printing large quantities, this is the printing method you should be getting into.

4. The machine is durable

You can’t take away durability from the gravure printing process. This is one of the many reasons why the gravure printing process is majorly used for long term printing jobs. The spare parts are strong and are easy to find in the market. They will also not cost you so much to repair. From setting up to the entire printing process, you will find it very straightforward.

5. Almost completely automated

You have only very little to do once you are all set up. The gravure printing process does most of the work for you.

Gravure printing also has some downsides, like not being suitable for short-term printing jobs. Not that you cannot use it but because it would consume a lot of ink.

Conclusion

Gravure printing is a trending printing method that every printing press should focus their energy on because it offers more advantages than disadvantages.

December 31, 2020 0 comment
0 FacebookTwitterPinterestEmail
Newer Posts
Older Posts

Copyright All rights reserved.


Back To Top
truesourcesoftware.com
  • Home
  • Technology
  • About Us
  • Contact Us
  • Resource
  • Terms of Service
  • Write for Us